
It’s not fair to think that we are all on the same page when it comes to your business and social media. In fact, let’s take a step back and acknowledge that we all have to start from somewhere!
We recognize that even today, with almost 2 billion worldwide users of Facebook, your business might still be struggling to find its footing on the social media platform.
So, let’s start from the VERY beginning!
How to Set Up a Facebook Business Page: A Beginners Guide
We are going to tackle this in 7 easy steps and lots of tips along the way.
A quick reminder of the difference between a Facebook business page and your regular profile:
- A personal profile is for individuals to connect with friends, family, and businesses.
- A business page is for businesses, brands, celebrities, causes, and other organizations to share information
Step 1 – Choose your page type:
Get started:
- Login to your personal Facebook profile
- Go to facebook.com/pages/create
- Choose your category
- Choose your subcategory/type
- Complete the required information
You’ll want to choose the page type that best fits your business. If you’re not sure which one to use, click on a page type and see what the options are. You won’t actually create a page until you click the get started button.
Note: by clicking get started you are accepting FB’s Terms and Conditions found here.
Step 2 – Upload your images:
Add a cover photo.
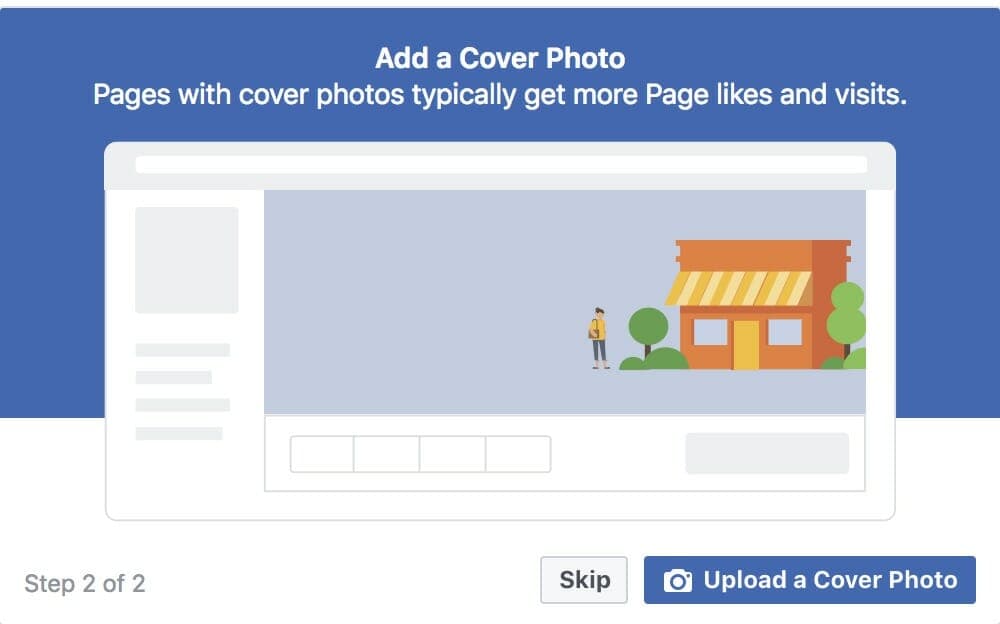
- The “photo” can be a photograph, video, or an illustrated image or graphic
- The best kind of digital image to use is a .png (though .jpg will also work)
Make sure the cover photo reinforces your business’s brand, and keep in mind that the image looks different on a smartphone vs. a desktop computer (see sizing tips below). Feel free to keep this image the same or change it out if you launch a new product, have an upcoming event, or would like to have a seasonal greeting.
Add a profile picture.
- To get the best results, use a .png image
- The profile picture will show as a circle in posts and ads, even if you upload a square image
Ideally, the profile would be your company logo or a well-recognized image associated with your business brand, and it should rarely change. It helps people quickly identify your Facebook page. If you want to change an image frequently, change your cover photo.
Image sizes:
PROFILE:
- 170 x 170 pixels (“pixels” is a commonly used way of measuring a digital file)
COVER:
What it looks like on a desktop computer:

What the same cover photo looks like on a mobile phone:
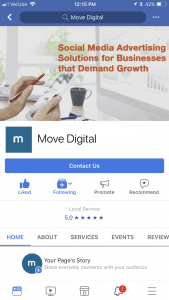
Photo:
- For an image that works well on desktop and mobile: 820 x 462 pixels
Video:
- Facebook recommends a video that’s 820 x 462 pixels
- Length should be 20-90 seconds
Step 3 – Complete the About section:
What is the About section:
- Your page information
- This is your opportunity to tell people about your business
- People will only see this information if they visit your Facebook page
The About section is a fantastic opportunity to make a good impression!! You’ll want to be clear and concise. If your text is too long, it won’t always show in full… few people click on “read more”.
Typical sections:
- General
- Business info
- Contact info
- More info
The exact fields that will show vary based on the page type you selected (in Step 1)
Example types of info needed / options based on page type:
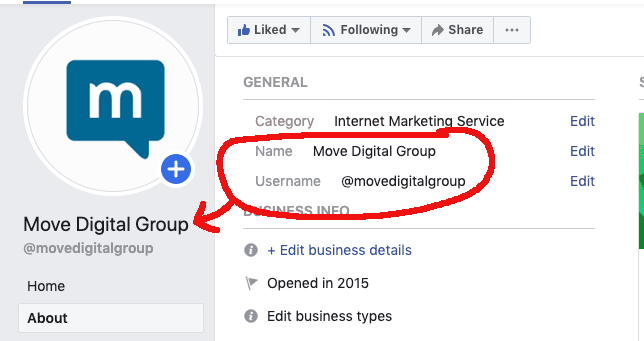
Step 4 – Create a username:
What is a Username:
- The way people find you on Facebook
- It is also your Facebook URL (direct website address)
Tips:
- Make your username the same as your website URL (if possible)
- Make your username the same as your other social media handles (when possible)
- Our Facebook username is @MoveDigitalGroup
- Twitter handle: MoveDigitalGrp (because MoveDigitalGroup was too long)
- LinkedIn address: https://www.linkedin.com/company/movedigitalgroup/
Also:
- Use a name that people will search for, like your business name
- Make it easy to type and avoid complicated acronyms
- Chose something people will remember
- Keep it as short as possible. The limit is 50 characters
- Use letters only (no special symbols like _, -, etc.)
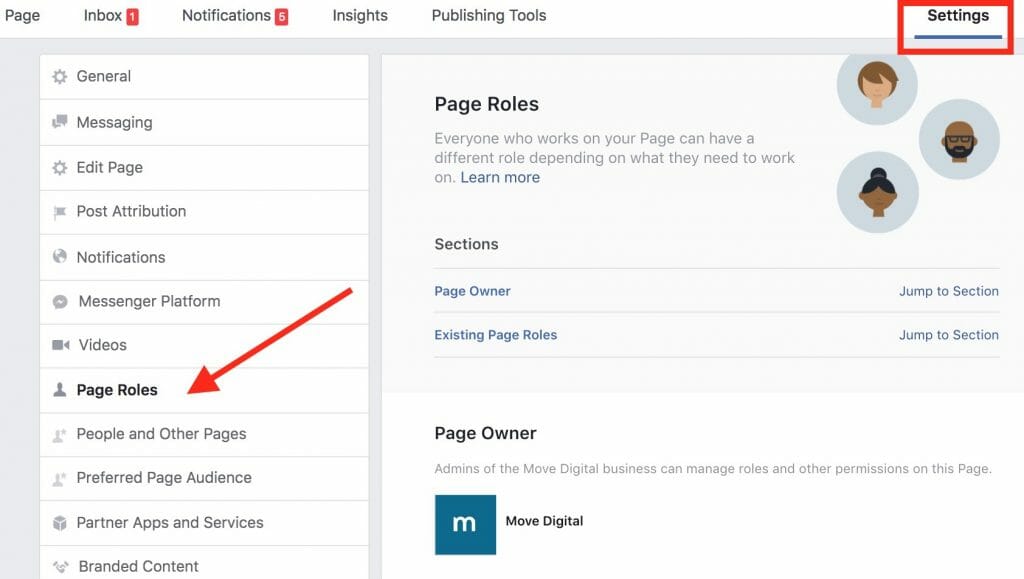
Step 5 – Assign any page admins:
Always have at least 2 admins on your business Facebook page. Admins are the people who can make changes to all of the things listed above! Having 2 will give you a backup at all times if someone forgets their password.
How to add a new admin:
- On your page visit settings → page roles
There are two options to add a new admin. First, you can use an email address, but it has to be the email address listed on that individual’s personal Facebook profile. Your other option is to search your Facebook friends, but that only works if you are connected to the person you are adding, so consider a temporary Facebook friendship! This can be the much easier option.
The admins should be:
- Business owner(s)
- The primary person who is managing the Facebook page
Step 6 – Add a call to action button:
A call to action (CTA) button shows up on/under your cover photo when someone visits your page.
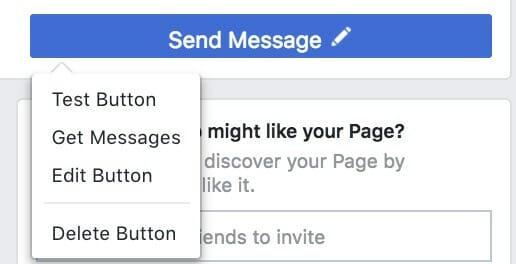
To add a call to action button or to change it:
- Click the pencil icon that appears when you hover over the button then select the edit button
Choices are:
- Book
- Make an appointment directly on Facebook
- Book appointments through Google calendar
- Link to a website
- Link to a 3rd party app or website like SimplyBook.Me or Booker
- Contact:
- Call now
- Send message
- Get quote
- Contact us
- Sign up
- Send email
- Learn more
- Watch video
- Learn more
- Shop/make a donation
- Shop now
- See offers
- Download app/play game
- Use app
- Play game
- Join community
- Visit group
What action do you want your audience to take? Choose the option that leads to your business goal.
Step 7 – Start creating content:
Now it’s time to start creating content!
Remember your business goals and what you want people to do. Be engaging and friendly… hard selling will turn people off.
Examples of types of content you can post:
- Plain text status
- Photo with caption
- Link with caption
- Video with caption
- Event page
- Location check-in
- Offer
- Live video
- Job posting
And there you have it… 7 steps to set up a brand-spanking-new business Facebook page. And if you already have one, you’ve probably seen where to fill some holes or make some updates. Good luck from the team at Move Digital and we’ll see you in our Facebook feed!